This page explains the most common features of using Route 1700. Read it to understand how the app works, and how you can best use it.
To download Route 1700 simply download the app from the app store of your device.
![]()
![]()
|
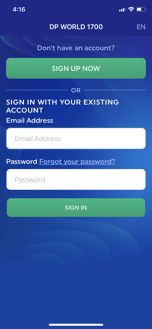
Tap the "Sign Up Now" button at the top of the screen to create an account. Fill out the fields on the subsequent screen to validate your email address and create an account.
If you already have an account fill in your account credentials to sign in.
Tap "Forgot your password" if you can't remember your password and need to reset it. Follow the on-screen instructions to complete this. |
 |
|
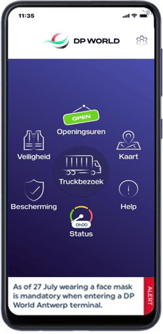
The home screen Once signed in you will arrive on the home screen of the app. This screen contains links to the various portions of the app as described in this section.
|
|
Opening Hours The icon let's you know if we're open or closed. Tapping on the icon will show you our actual opening hours, when we're closed or on holiday, and when we have special openings.
|
|
Map Tap this icon to see a convenient map with locations and their details at the terminal. |
|
Help An easily searchable FAQ with many questions and answers. |
|
Status Tap this icon to see:
|
|
Security Important safety and security rules are detailed in the page behind this icon.
|
|
Safety A must-do before your first visit to the terminal! Check out the terminal safety video. |
 |
Important alerts
Very important alerts are displayed directly on the home page, with less important alerts on the status screen. |
|
Truck visit Use this to follow your visit at our terminal. |
You can use Route 1700 to get details and extra options during your visit at our terminal.
| Step 1 |
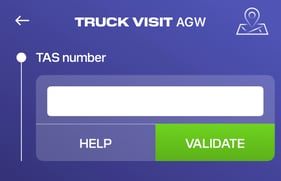
To start a truck visit tap the Truck Visit icon at the center of the home screen. | 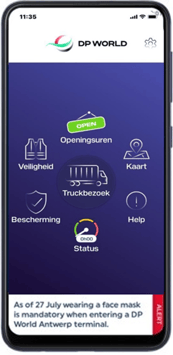 |
| Step 2 |
Enter your TAS credentials
|
|
| Step 3 |
On the next screen you will see details of your visit, including details about your linked transactions. |
|
| Step 4 |
If you haven't already, be sure to enter your Alfapass on the pop-up to continue the following steps. |
|
| Step 5 |
Follow the instructions to proceed through the terminal and arrive at the administration building. Be sure to tap "Ready" after each step. |
|
|
Step 6 |
Finally you will arrive at the administration building. Park your vehicle and enter the building to check in and complete any necessary administrative transactions at the self-service desks. The spinner will keep turning at the bottom-right of the card until you have finished checking in at the administration building. Once you have completed this at the self-service desks the "Ready" icon will appear and you can continue your visit. |
|
|
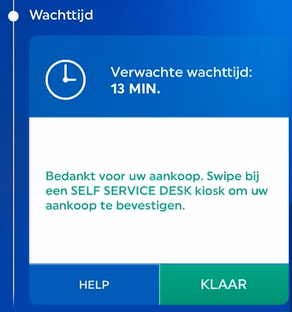
Step 7 |
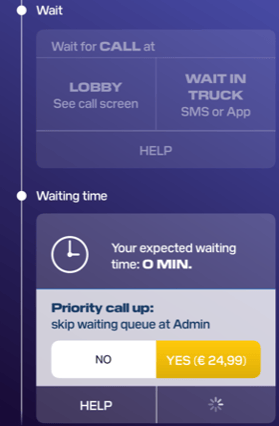
Having completed your administration you will now need to wait for your call up. This is the time it will take to get ready for your container transactions. You can see how long you'll need to wait for your call up right in the app. Keep an eye on the time as it goes down (illustrated on the right at the bottom). |

|
|
Step 8 |
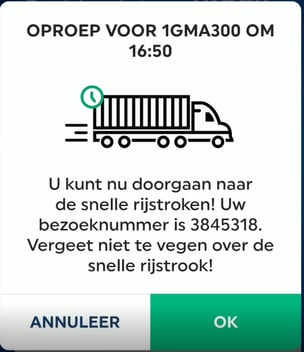
Once your time has run out you'll receive a call-up notification. This means you can now drive to the FAST lanes. |
 |
|
Step 9 |
Arrive at the FAST lanes. Here you will again need to enter some information into the kiosk. Once completed continue your visit. |
|
| Step 10 |
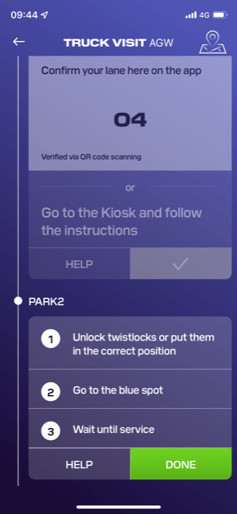
Having passed the FAST lanes you will now receive information on at which parking lots or lanes you will complete your transactions. |
|
|
Step 11 |
At the relevant parking lot or lane you will see instructions on what to do while there. Pay close attention to any safety requirements. Be sure to conduct all transactions as mentioned on either Route 1700 or the paper ticket you received at the kiosk (if you recevied one). |
|
|
Step 12 |
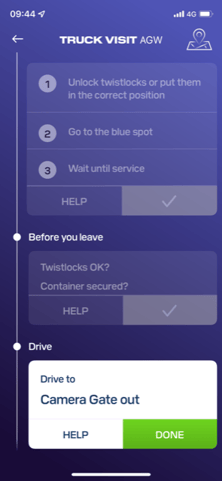
Having concluded all transactions you will now need to leave the terminal. Follow the instructions to exit the facility. Thank you for visiting us! We hope to see you again soon. |
|
Our app has a feature that lets a user move an appointment up to an earlier slot through an in-app-purchase, even if the slot is full. This lets you conduct a truck visit even if you arrive too early for the slot you have an appointment for giving you greater flexibility and control over your logistics process. For example, if you arrive at 3pm but your appointment is at 7pm, purchasing this feature will let you move your appointment up to 3pm.
There are limited quantities of this feature. The number of times this feature can be used is limited per time slot, but is renewed again at the start of the new time-slot. If you do not see this option appearing it is likely that it is sold out for the slot.
You must have a good internet connection to purchase this feature. Poor internet connections will either prevent you from completing the purchase, or even seeing the feature altogether.
Payments are handled directly through the Apple App Store or Google Play Store (depending on what device you have). You will receive proof of payment via email from either Apple or Google (depending on where you made the purchase), but can also look up your purchase history in the respective app stores:
Apple: https://support.apple.com/en-us/HT204088
Google: https://support.google.com/googleplay/answer/2850369?hl=en
If you need help using this feature please contact us.
Caution: A trucker must be on the terminal to use this feature. If this feature is used while the person conducting the truck visit is not on the terminal the payment will process but your TAS appointment will be cancelled by the system due to a no-show.
To use this feature perform the following steps:
| Step 1 | Start a truck visit and drive to the administration building. Follow steps 1 through 6 in section 2.1 above. |
|
| Step 2 |
If there are enough in-app-purchase options left for the slot, you will see the option to make a purchase to re-book your appointment appear as illustrated in the screenshot here. On the app the orange buttons will also display the price of the item. This option will appear even if all slots are full, making this a great way to compensate for last-minute planning changes. Caution: If you are not at the terminal when you purchase this feature your payment will go through but you will lose your rights to the visit. Do not use this if you are not at the terminal. |
|
| Step 3 | Decide whether you would like to make the purchase, and then tap the "Yes" button. You will now be requested to pay either through the Apple App Store or Google Play Store. How this works depends on your device and how you have connected a payment mechanism to your device. | |
| Step 4 |
If your payment was successful you will now see a confirmation message on the screen. | 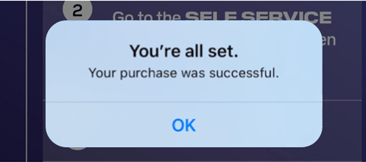 |
| Step 5 |
You have now successfully re-booked your appointment to an earlier slot, even if it was full. Follow the on-screen instructions: go to the self-service desk and swipe your Alfapass. Follow the on-screen instructions and conduct a truck-visit as normal. Steps 7 and onward as described in section 2.1 apply here. |
|
The Priority Call Up is another feature that puts you in control of your time. This feature can be used to skip the queue at the admin building. For example, if you've just processed your check-in documents and now see that you'll need to wait 15 minutes, you can use this in-app-purchase feature to skip the 15 minute wait and go straight to the Fast Lanes.
There are limited quantities of this feature. The number of times this feature can be used is limited per time slot, but is renewed again at the start of the new time-slot. If you do not see this option appearing it is likely that it is sold out for the slot.
You must have a good internet connection to purchase this feature. Poor internet connections will either prevent you from completing the purchase, or even seeing the feature altogether.
Payments are handled directly through the Apple App Store or Google Play Store (depending on what device you have). You will receive proof of payment via email from either Apple or Google (depending on where you made the purchase), but can also look up your purchase history in the respective app stores:
Apple: https://support.apple.com/en-us/HT204088
Google: https://support.google.com/googleplay/answer/2850369?hl=en
If you need help using this feature please contact us.
Caution: A trucker must be on the terminal to use this feature. If this feature is used while the person conducting the truck visit is not on the terminal the payment will process but your TAS appointment will be cancelled by the system due to a no-show.
To use this feature perform the following steps:
| Step 1 |
Start a truck visit, drive to the administration building, and process your administration at the self service desks to receive a waiting time. Follow steps 1 through 9 in section 2.1 above. | 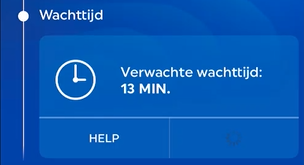
|
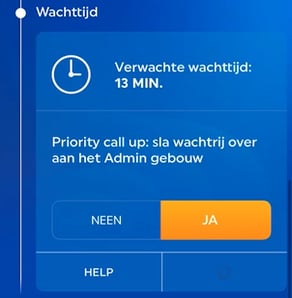
| Step 2 |
If there are enough in-app-purchase options left for the slot, you will see the option to purchase a Priority Call Up appear as illustrated in the screenshot here. On the app the orange buttons will also display the price of the item. |
|
| Step 3 |
Decide whether you would like to make the purchase, and then tap the "Yes" button. You will now be requested to pay either through the Apple App Store or Google Play Store. How this works depends on your device and how you have connected a payment mechanism to your device. | |
| Step 4 |
If your payment was successful you will now see a confirmation message on the screen. | 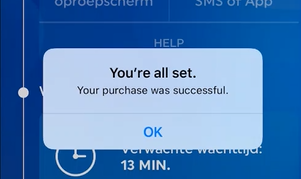 |
| Step 5 |
To complete your purchase of a Priority Call Up follow the onscreen instructions: you will need to swipe your Alfapass at one of the self-service kiosks (the red desks) at the administration building to confirm your purchase. Failing to do so will result in the purchase not being applied to your truck visit. From here simply conduct a truck-visit as normal. Steps 10 and onward as described in section 2.1 apply here. |
|
For help on common problems or other questions, please see our FAQ. Alternatively you can write us a message.